Strawberry Guava Jam

strawguavajam-5

I moved to San Francisco exactly three weeks ago (a move that I will post about later!) and with the move came: TEMPORARY funemployment, closer proximity to Berkeley Bowl, and friends eager to learn about making jam (among many things). The combination of these three random things somehow resulted in homemade strawberry guava jam! It began when a friend and I went to Berkeley Bowl to where we let the produce inspire us. With strawberry season at its peak, we could not pass up the gorgeous bright red, cheap organic strawberries. But every jam needs pectin and strawberry doesn’t contain much so we looked for a tropical fruit that contained more pectin and chose guava. Thus our jam making journey began!

I weighed the ingredients I used because I prefer measuring with weight. Feel free to be loose about every measurement! Your jam taste buds may be very different from mine.

Ingredients:
150 grams guava (about 3 medium sized)
368 grams (one small green tray that we overstuffed :P)
75 grams brown sugar
50 grams white sugar
~ 1 tsp. lemon juice
a pint-sized mason jar

strawguavajam-1
Remove some of the seeds from the guava. I like to keep a little bit of the seeds because the fleshy part of the guava where the seeds are attached is sweet and pulpy. It’s also fun to bite into seeds sometimes.

strawguavajam-3
strawguavajam-2
Slice your fruit into small cubes. They don’t have to be exactly the same size but as uniform as possible.

Then take a small pot and put the sliced guava in it. Fill the pot with just enough water to cover all the guava. Let it boil. Then lower the heat and simmer the pot uncovered for about 20-30 minutes or until most of the water is boiled off and the guava is mushy when poked with a fork. Mash it up real nicely while leaving a few chunks. It should look like this:
strawguavajam-4

While letting the guava boil, fill another pot with the strawberries. Simmer it covered for about 30 minutes or as long as it takes for the strawberries to release its juices. You can add the lemon juice now if you want or omit it altogether.

Once the strawberries have released a good amount of juice, crank up the heat to medium high and add the sugars. Let it boil for a few minutes while stirring frequently. Add the guava. Let it boil for a few more minutes and allow for the whole mixture to come together. Once you like the consistency of the jam (which depends on how much of the liquid you boil off), turn off the heat. It should look something like this:
IMG_2459
(Sorry for the poor photo quality!)

Once the jam is done, put the hot jam in the sterilized jar***. I let it cool for a bit before refrigerating and enjoyed it once it was cool.

strawguavajam-6
This jam is good on toast, Greek yogurt, or lemon thyme shortbread (as shown by the picture above)

IMG_2463
Jam making success! (:

***NOTE about canning: I am no expert on proper canning technique. BUT I did sterilize my jar by placing all of its pieces in a large pot of water, boiled it for 30 minutes and took it out with tongs right as my jam was ready to go in. Use a hot jar for hot jam!

Salad Days

IMG_2286

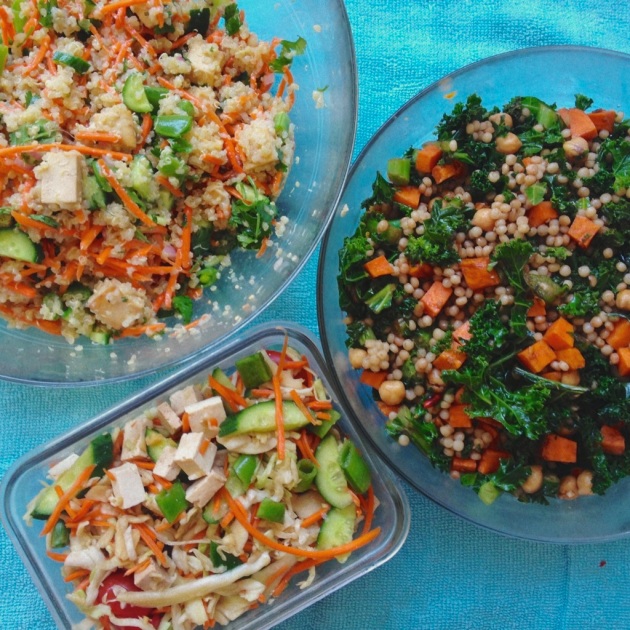
Do you ever have those days when you wake up and you just want to create something? Last Wednesday I woke up wanting to make salad. Not just one salad, but three different kinds and all in large quantities. It was an incredibly therapeutic activity for me, so much so that I didn’t bother to document the process and almost didn’t snap any photos of my creations or tell anyone about what I made. But thank goodness for a good friend who encouraged me to share these creations with others! So many people are eager to eat healthier and if these recipes can help them do so, I’d be glad to share!

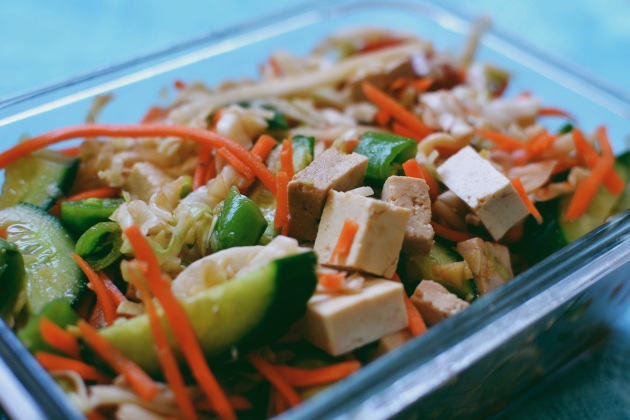
Cabbage Salad Wrap with a Ginger Garlic dressing adapted from Hello Paper Moon
IMG_2297

Ingredients:
Whole wheat wraps
3 cups shredded green cabbage
1 1/2 cups julienned carrots
3/4 cup sliced cucumbers
1/2 cup sliced sugar snap peas
1/3 block extra firm tofu
little bits of cooked shrimp (optional)

Ginger Garlic Dressing:
4 cloves minced garlic
1 to 2 inch block of minced ginger
1/2 cup olive oil
1/3 cup rice vinegar
1/4 cup soy sauce
2 tbsp honey
3 tbsp water
a squeeze of Sriracha

Combine the dressing ingredients in a jar or sealed container and shake vigorously until mixture is homogenous. Toss the salad ingredients together in a large bowl. Slowly pour the ginger garlic dressing until it covers all ingredients. I only used a little more than half of the dressing recipe. Serve salad in a whole wheat wrap or eat by itself. Feel free to change any of the quantities for the salad and dressing. Measure to your tastebuds as I do with mine! (Just a note that I do prefer my foods spicier and more sour than “normal”)

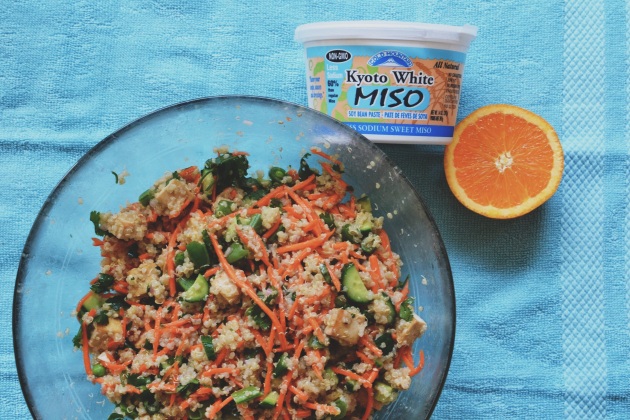
Quinoa Salad with Miso Orange Dressing inspired by Sprouted Kitchen
IMG_2296

Ingredients:
2/3 block extra firm tofu
Canola oil
1 tsp soy sauce
Fresh ground pepper
2 cups cooked quinoa
1 cup thinly sliced carrots
½ cup sliced sugar snap peas (edamame would probably taste better)
2 tbsp toasted sesame seeds
Chopped cilantro (I’m always very generous with adding cilantro!)

Dressing:
2 tbsp white miso
1 tbsp honey
1 tbsp sesame oil
3 tbsp rice vinegar
1 shallot minced
Juice of half an orange

Heat the oil in a pan. Slice the tofu into ½ inch cubes and add to the pan when the oil is hot. Add the soy sauce and a little bit of pepper and sauté for a few minutes. Let it cool.

Combine the quinoa, thinly sliced carrots, snap peas, sesame seeds and tofu in a large bowl. Mix the dressing together and pour in the bowl of quinoa. Roughly chop the cilantro and mix into the quinoa. I prefer to eat it cold rather than room temperature but either way should be fine.

IMG_2294
Delicious!

Kale Israeli Couscous Salad
IMG_2295
I first discovered Israeli couscous at Mendocino Farms where they make a deliciously tangy Israeli couscous salad. I knew that I wanted to recreate it someday. While this salad is not quite like the one from Mendocino Farms and was birthed from the random leftover ingredients in my fridge, I was rather pleased with the result so I decided to make it again! Kale is such a healthy and complex green that it just feels so good to consume it and I love the chewiness of Israeli couscous!

Ingredients:
2 cups cooked Israeli couscous (Trader Joe’s sells a box)
4 cups kale
1 medium to large sized sweet potato
½ cup chickpeas
Grape tomatoes sliced in half (only include if they are sweet!)
Crumbled feta cheese
Balsamic vinegar
Olive oil
Red pepper flakes
Salt and pepper to taste

Cook the Israeli couscous according to the instructions on the box and then set aside to cool. Chop the kale into small pieces, making sure that the stems are sliced small. Have a bowl of iced water ready. Boil a large pot of water. Blanch the kale in batches for about 30 seconds to a minute and then immediately place in the ice water bath. Drain well. (Alternatively, you can chop the kale into smaller pieces after blanching).

Prick the sweet potato with a fork in a few places. Bake it in the oven at 375 degrees for 30-40 minutes. Take it out when it is just soft enough for the fork to go through but not mushy. Let it cool. Once it is cool enough to handle, peel it and cut it into small cubes.

Combine all ingredients together in a large bowl. Create a balsamic vinegar dressing using 2 parts balsamic vinegar to one part olive oil. Add some salt and pepper and dress the salad. Sprinkle some red pepper flakes. Keep in the fridge for a few hours before serving to allow the dressing to penetrate the salad. Serve it cold with crumbled feta on top.

I hope you enjoy your creations! Happy salad eating!

Good Eats from San Francisco (and East Bay)

IMG_2156

I took a recent trip to Northern California where I spent most of my time in San Francisco  eating my favorite food (ice cream, 6 days in a row…not gross at all!), exploring the different neighborhoods, and soaking up the rare sun rays in the otherwise foggy city. San Francisco has such an amazing food scene, one that I greatly admire and respect. Since I was there for 10 days, it meant that I had plenty of meals to spend exploring all the good food SF and the East Bay have to offer!

Here are photos of some notable dishes and meals from my trip:

DSC_0302
The shrimp ceviche from Chubby Noodle, a pop-up inside Amare bar in North Beach. The dishes were mediocre in my opinion, but I thought this ceviche was pretty good and I had a great time eating outside with friends while people-watching :)

DSC_0321
The #5 combo from Cordon Bleu Vietnamese Restaurant, a hole in the wall in Nob Hill. I was surprised at how much I enjoyed this cheap plate of food that comes with a delicious and crisp egg roll, flavorful 5-spice marinated chicken, a strip of beef kabob (random), and some tomato based sauce to go on top of the rice. Definitely enough for two meals!

DSC_0327
This is the grilled pork on vermicelli from Pho Ao Sen in East Oakland. While they are known for their pho and bun bo hue, I almost always get the pork with vermicelli and love that this place gives you plenty of meat and provides a flavorful sauce!

DSC_0341
The fried egg and bacon open face sandwich from Outerlands in Outer Sunset. Really long wait for a casual Friday lunch, but they really satisfied my cheese and egg craving! The bread was also really thick and toasted perfectly.

DSC_0350
The fried egg sandwich (do you notice a trend here?) from Plow with crispy potatoes. Oh those crispy potatoes were almost like potato chips in cube form but with better seasoning and more substance. Delicious! The fried egg sandwich was tasty, though a little greasy since I added bacon. I also tried my friend’s lemon ricotta pancakes which I LOVED but I also do love anything lemon flavored.

DSC_0343
The monkey bread from Plow is also a must-try!

IMG_2145
Two scoops of ice cream (balsamic caramel and brown butter) from Humphry Slocombe in the Mission for a post breakfast snack. Balsamic caramel sounds pretty interesting and is definitely an acquired taste for most but I loved it since I’m a fan of tangy, sour and sweet! Brown butter is the ice cream flavor I wish I invented and is probably one of my all time favorite ice cream flavors, though I wish there was some crunch in there for texture.

DSC_0392
If you’re in the Mission district in SF and feel like eating Mexican food that’s slightly healthier, go to Papalote where the lines are shorter and the food is definitely less greasy. The chili verde taco is wonderful and it comes with plenty of fresh goodies!

DSC_0418
The crawfish beignet from Brenda’s French Soul Food is definitely worth waking up at 7 am on a Monday for.

DSC_0423
So is their shrimp and cheese grits! A little heavy for breakfast, but I mean, breakfast should be the biggest meal of the day right? Brenda’s will surely fulfill that!

IMG_2144
Oh Ici, what a love-hate relationship we have. Love because it MAY be my favorite ice cream place in the Bay Area and this malted vanilla chocolate chip totally validates that statement. Their ice cream is just so light and good! It’s also probably the only place where I’ll even consider getting a cone because of the little chocolate surprise on the bottom of each one! Hate because going 5 days a week during undergrad really didn’t do my wallet any good.

DSC_0430
Ah, Salumeria – a fun discovery in the Mission! Their roast beef sandwich is delicious and they have a wonderful seating area with great lighting, perfect for instagramming and food photographing ;)

IMG_2114
Of course, every meal needs dessert! Not just one, but three! (I guess four if you count the scoop of Bi-Rite ice cream that I’m not picturing in this post). No trip to SF is complete without a Tartine visit. I was so tempted to get the Lemon Meringue Cake, but opted for a morning bun and banana cream tart instead! I do wish I got a slice of Tres Leches and I totally would’ve if I didn’t also buy a caramel chocolate mini loaf from Craftsman & Wolves that was sort of forgettable. Cool store concept though!

DSC_0433
What better way to end my SF trip than with some duck on a bed of farro from Olea in Nob Hill? Chef Gabriel Amaya is truly talented and kind as well!

Looking at these pictures reminds me of what an amazing 10 days I had in NorCal. I’m truly blessed to able to enjoy such good food with even better friends! Thank you all for a wonderful trip!

Ratatouille a la Remy and Baked Eggs

DSC_0118
Task me to cook dinner and I will make you my favorite chef’s prime creation, Ratatouille (and baked eggs for extra protein)! That chef is of course none other than Remy, a fictional rat from my favorite Pixar movie, Ratatouille.

In the movie, Remy is asked to cook for a famous food critic and out of all the fancy French dishes he is capable of making, he chooses to make Ratatouille…but in his own style! I don’t know too much about French cooking, but I do believe that Ratatouille is traditionally made in a pot, like a vegetable stew. In the movie, Remy slices the vegetables thinly and roasts it in the oven with some herbs and tops it with a sauce. The first time I wanted to recreate the dish, I found this New York times recipe that was supposedly conceptualized by the man/lady who made recipes for the movie. I tried making it during college and it wasn’t too difficult, though it was rather time consuming. This time around I wanted to try a simpler version so I used Smitten Kitchen’s version, which was much easier but still incredibly delicious!

DSC_0100
The main ingredients are very simple and easy to find. Some vegetables and a sprig of thyme is all you need! I substituted tomato paste mixed with water and a little tomato sauce for tomato puree because I already had them in my pantry. They worked just fine!

DSC_0105
The key to this recipe is to acquire and utilize a mandoline. Chopping these vegetables thinly is not very fun if you don’t have a sharp knife and above average knife skills. Don’t get too caught up on arranging the vegetables perfectly (I know I did the first time). Just make sure to alternate between each vegetable. Make sure you use salt and pepper generously!

DSC_0125
I served the Ratatouille on a bed of whole wheat couscous that I purchased from Trader Joe’s. It’s very easy to cook and pairs well with the Ratatouille. Do listen to Smitten Kitchen and top it with goat cheese. It works really well with it!

DSC_0107
I was brainstorming protein dishes that I thought would complement the Ratatouille well without taking the spotlight away from it and figured I should stay away from meat and go for eggs! To jazz my eggs up a little, I decided to bake them. All I used were:

– grated parmesan cheese
– sliced up ham/prosciutto/bacon/pancetta
– fresh parsley (sliced very small)
– fresh thyme (sliced very small)
– eggs, of course
– salt & pepper
– cute little ramekins to bake them in!

DSC_0110
It was very easy to make. Simply crack the eggs and place them in the ramekin. Top it with the cheese, fresh herbs, sliced up meat and sprinkle some salt and pepper. I held off a bit on the salt because I knew that the cheese and meat would add saltiness to it. Bake in the oven at 350 degrees (same temperature as the Ratatouille) for about 10-12 minutes for a runny egg (which I love!). The deeper the ramekin, the longer it takes to cook and since mine were pretty shallow, they were done in 10 minutes.

DSC_0121
Voila! Delicious and sophisticated baked eggs that can be served during any meal. Doesn’t that soft, bright yellow yoke just make you hungry?

This dinner was good for 3 people with a very small amount of Ratatouille leftover, which I then scrambled with some eggs the next morning for breakfast and topped with goat cheese!
DSC_0132
I ate it with a crispy whole wheat toast. It was a lovely, hearty breakfast. Two great and pretty healthy meals from one dish. Success! Thanks Remy and Smitten Kitchen!

Lemon Meringue Cake

IMG_1829

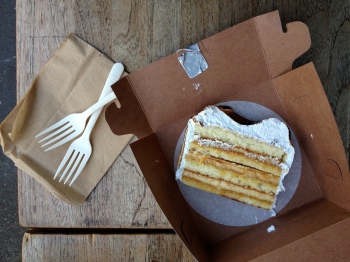
Two weekends ago, I was in the Bay Area for a very short trip and as usual, I made sure to include some foodie adventures in the short amount of time I was there. I was able to spend a whole day in San Francisco since I was staying there with a good friend of mine. One of the places we went to was Tartine, the famous bakery in the Mission District. I have tried only a handful of items from their menu and I went this time intent on purchasing just one or two morning buns. Unfortunately, they were sold out of morning buns by the time we got there so I had to quickly decide what other sweet treat I wanted to get. I quickly opted for the Lemon Meringue Cake (pictured above) because I love cake and lemon flavored desserts. One bite…and I was MADLY in love with this cake. I sat on a bench outside, slowly chewing, tasting and trying to identify the flavors that were in the cake. I tasted sweetness, tartness from the lemon, a slight bitterness, vanilla and a myriad of other more subtle flavors. I was mind blown at how much I enjoyed that cake that I really could not think of anything but trying to recreate that cake once I got home, especially since I own the cookbook AND have seen the recipe for it before!

DSC_0083

Well I went ahead and recreated that delicious cake! I’ll go ahead and say what you’re probably thinking: this is not a pretty cake. It could’ve been much more eye appealing if I didn’t let my meringue sit in the fridge for a while, deflate, and then frosted it flat onto the cake. The cake is definitely missing the pointy swoops and fluffiness of medium stiff peaks consistency.

DSC_0087

I also had to: ask everyone I know if they had a kitchen torch, end up purchasing one myself, run all over Culver City like a maniac looking for butane and overcome my fear of fire and small flames. I never found butane (until yesterday -___-) and ended up using a gardening torch, which was a bit larger but worked just fine.

DSC_0085

Let me tell you though, even after all the trouble I went through to procure all the necessary ingredients (my first time purchasing a vanilla bean!) and kitchen tools (pastry brush, 10 in. pan, cake box), I’d have to say that it was absolutely worth it. This cake is probably the most delicious cake I have ever made! That’s just personal opinion though since I know not everyone likes lemon.

This cake has several components, all of which are delicious and are some of my favorite flavors! All in all there were 5 recipes within this one recipe including:
DSC_0038
lemon cream (which is not the same as lemon curd! the difference is in how the butter is incorporated)

DSC_0050
A more sophisticated caramel (that includes vanilla bean — look closely and you can see it!)

The other three components were the layers of chiffon cake, lemon syrup and Italian meringue. It would’ve been much better if I had made some of the components beforehand, but nope. I was feeling extra ambitious and decided to tackle the entire cake recipe, my hummingbird cupcakes from the previous post AND mac & cheese cupcakes all in one day. Let’s just say I spent 12 hours in the kitchen and 5 hours running around trying to find all the ingredients and tools for all three items. But even after all the hard work and effort, I can’t say that I regret any of it! I am proud of this cake (and have eaten it for breakfast) and know that next time I’ll just make some of the components beforehand and improve upon my meringue-making!

* If you would like a copy of the recipe, feel free to contact me! It’s way too lengthy for me to post it all here, though I’m sure it’s out there on the web somewhere.